A Tale of Two (V. Different) Breads

four mini loaves of stollen dusted with sugar

This week I made two kinds of bread: Stollen for holiday gifting (and enjoying) and Adventure Bread for holiday survival.

Stollen is not quite yet a personal tradition, but is my current attempt to meet my desire to have something homemade to bring as host gifts, etc. in the holiday season. It’s what I plan to bring with me for Christmas travel and what I snuck into the gift package for my sister’s household.* Honestly, I quite like it, but given that it’s a cross between bread and fruitcake held together with massive amounts of butter, of course I like it; also I wouldn’t be surprised if some people I know are a bit more reserved. A more crowd-pleasing recipe may supplant stollen someday as my holiday go-to.**

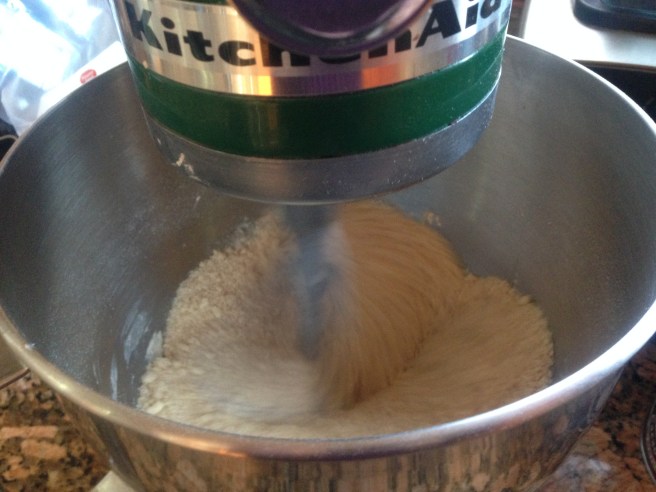
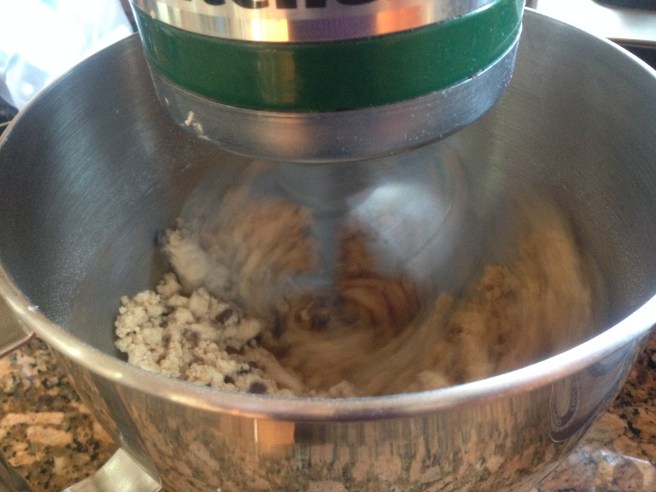
In the meantime though, stollen! I use the Melissa Clark NYT recipe, but with ~1/2 cup of rye flour substituted for some of the AP and with ~1/4 cup more milk. This year’s version also has more ground ginger than strictly called for due to a “reading the recipe while cooking” error.*** We’ll know how tasty it is when we open the first one on Solstice.

Adventure bread is an entirely different thing. It’s super-easy, gluten free, and vegan. I make it for myself, because it’s a great answer to “What the heck am I gonna eat?” when I find myself surrounded by cookies and busily making intricate plans for meals that are still a week away. Adventure bread makes fantastic toast and is an excellent vehicle for butter, peanut butter, pesto, cheese, or whatever else I happen to have on hand. It’s also delicious. David Lebovitz has a great write-up of how to make it. Recommended.****


*Hi Sis! If you’re up for it, the directions say you should sprinkle even more powdered sugar on top before serving. Crazy, hunh?

**Suggestions welcome!

***It really does pay to read recipes through beforehand, even if I’ve made them before, but…

****particularly as a cookie hangover cure, should you find you need such a thing.


Home Again, Home Again – Chili and Cornbread

a round of cronbread with honey and butter in the background

We’re home from our American Thanksgiving gallivants, and dinner tonight is comfort food. For us, comfort food is often chili and cornbread*.

Chili is not really a recipe. Tonight’s has: onions, garlic, Serranos from the garden, salt, cumin, ancho chili, smoked paprika, epazote, yellow paprika, cocoa powder, ground beef, and crushed tomatoes. Other nights might have a different combination of peppers, maybe no epazote, and beans. Tonight’s would also have kale, if I had any, because I have a bad habit of sneaking kale into many things**.

My basic cornbread is pretty much just that, basic. I’m too much of a Northerner to claim any special cornbread skills or lore. It is good though.

  • 6 oz. corn meal
  • 2 oz. whole wheat flour (or other flour)
  • 1 1/2 tsp baking powder
  • 1/2 tsp salt
  • 1/2 tsp Aleppo Pepper***
  • 8 oz (1 c.) milk (any kind)
  • 2 eggs
  • 4 0z. butter, plus a little for the pan

If you have a 8 to 10 inch cast iron skillet, put the cold butter in the skillet and put the skillet in the oven before preheating. (If not, just butter an 8 or 9 inch square or round pan.) Preheat oven (and skillet) to 350º.

Whisk together the dry ingredients in a medium sized bowl. In a separate container (that will hold at least two cups), whisk together the eggs and milk. Once the butter is melted (melt it separately if not using a cast iron skillet), whisk it into the milk and eggs. (Put the skillet back in the oven while doing the final mixing.) Fold together the liquid and dry ingredients until just mixed. Scrape into the prepared pan and bake until firm and lightly browned, ~20 minutes.


*I also almost immediately made banana bread from the bananas that had languished here while we were out. It was almost as immediately gone. I’d share that recipe, but I just use one of Smitten Kitchen’s, so really you should just get it from her.

**Because I actually like kale.

***Here’s a connection I often think about when opening my spice drawer – Aleppo Pepper is originally from Aleppo, Syria. Syrian supplies have dried up due to the war there. I get Aleppo Pepper from Penzey’s, which imports it from Turkey, but I still never use it without thinking how global our connections are and without hoping for peace the people of Syria.

Cream Scones, the 2nd – My Favorite

As I mentioned, I have a few go-to scone recipes. This one is my favorite. It’s not as easy as Cream Scones, the 1st, because you need to cut in the butter, but I secretly like cutting in butter, and these are delicious, and I learned them from one of my favorite people in culinary school, so…

Cream Scones (II)

  • 2 c flour
  • 1 T baking powder
  • 1/2 t salt
  • 1/4 cup sugar
  • 4 oz butter
  • 3/4 cup dried fruit
  • 1 1/4 c cream
  • melted butter & coarse sugar

Preheat oven to 425º

Whisk together the dry ingredients, then cut in the butter. (I do this with my fingers, but a pastry cutter, or two knives, or a food processor will also work well.) Add the dried fruit, then the cream, mixing and flattening with a spatula until just forming a rough dough. Turn the dough out onto the counter, then fold it over itself and flatten, repeating until it comes together somewhat uniformly. Shape the dough into two circles, and cut each into 8 wedges.

Place wedges, evenly spaced, on a parchment or silpat lined baking sheet, and brush with melted butter, then sprinkle with coarse sugar. Bake until golden, ~12 to 15 minutes.


Note: the image used for this post is based on this recipe, but the scones were made mini-sized to serve with a kids’ homemade high tea.


The Easy Scones – for Slow, Companionable Mornings

When people ask me what my favorite thing to bake is, I often answer “scones”. This may be simply a way of dodging the pie vs. cake debate*, but it’s also true. I love scones. They’re easy, and delicious, and still manage to feel special. They can be dressed up for tea, or made simple for potluck breakfasts.

I have a few go-to scone recipes. This one is the easiest, and great for if you wake up tomorrow and want to make something for a easy breakfast nibble.**

Cream Scones (I)

  • 7.5 oz (1 1/2 c) flour
  • 2 1/2 tsp baking powder
  • 1/2 t salt
  • 1.75 oz (1/4 c) sugar
  • 2.5 oz (~1/2 c) dried fruit (chopped to raisin size or so)
  • 1 c heavy cream
  • 1/2 tsp vanilla (or some lemon zest)
  • milk or cream and coarse (or regular) sugar for garnish

Preheat oven to 375ºF. Whisk (or mix) the dry ingredients together, then add dried fruit. Add cream and vanilla together and stir with a spatula until just mixed. You should have a rough dough. Pat into a round disk, ~1/2 inch thick, and cut into eight (or twelve) wedges.*** Place wedges, evenly spaced on a parchment or silpat lined baking sheet. Brush tops with milk (or cream) and sprinkle lightly with sugar. Bake until golden. ~20 minutes.


* The answer to “pie vs. cake”, of course, is often “tart!”

**If you don’t happen to have any pie, that is. Leftover pie for breakfast is a wonderful tradition.

***I use a bench scraper for this if I have one, but knife or other handy straight edge will work fine.

Procrastinating via Shortbread

completed shortbread finger cookies on a baking sheet with silpat

My family is getting on a plane this evening, traveling to see two sets of loved ones for Thanksgiving. This means I’m currently putting off packing and thinking about airplane snacks. Therefore, shortbread!

Shortbread is one of my favorite spur of the moment things to bake. It’s simple. It’s forgiving. It’s delicious. I’ve fallen out of the habit recently, but baking shortbread was even a part of my wedding vows.

Here’s how I do it these days: 1-2-3 Shortbread – 1 part sugar, 2 parts fat, 3 parts flour.

  • 6 oz flour – can be pastry or AP or a blend including oat flour. add a bit of rice flour if you like your shortbread crisp.
  • 4 oz cold, unsalted butter
  • 2 oz sugar
  • 1/2 tsp salt
  • flavoring and additions such as today’s:
    • 1/2 t vanilla
    • 1/4 c baker’s cut candied ginger
    • 2 T chocolate coated cocoa nibs

Blend flour, sugar, and salt in the bowl of a stand mixer*, fitted with the paddle attachment. Cut the butter into slices or cubes and add to the flour mixture. Mix on low until the dough begins to come together. This will take a long time, ~10 minutes**. You’ll see it progress from floury to sandy to pea sized clumps.

From this: sandy mix of flour and butter being mixed in a green kitchenaid mixer

To thisdough forming pea-sized clumps being mixed in green kitchenaid mixer

Once the dough begins to come together, add your flavorings and mix until well-incorporated.

Once the dough is blended, press it into a log (~2in diameter), or a rectangle or circle (~1/2 in thick), or shortbread molds if you have them and are feeling fancy, and chill for a bit in the refrigerator (30 minutes to… forever, more or less) either covered or wrapped in plastic wrap. Slice or cut into your desired shape and bake at 350ºF until done, just beginning to color at the edges, golden but not deep brown.

(Baking depends on the shape and thickness of your cookies. The fingers I just made took ~17 minutes.)


*yes, you really do want a stand mixer for this.

**this is why I said you’d really want a stand mixer

Pizza Dough, Revisited Already

rounds of pizza dough spread with tomato sauce

So yesterday I told you how I make pizza dough, but I left out a few notes and sounded way to authoritative about some details. The most important note is: it doesn’t really matter! You can make homemade pizza crust out of just about any bread recipe. You can buy pizza dough in the freezer section of your grocery store. You can use par-baked pizza crusts. You can order delivery pizza. Just do have dinner. Dinner is a great idea.

The dough I usually make can be summed up as “60% hydration”. That’s actually how I remember it. Hydration refers to how much liquid you have in relation to flour. You may also see the term “Baker’s Percentage”. This is all a useful way to think about various bread doughs. Higher hydration is a really wet dough, harder to knead, prone to bigger holes, generally reserved for slow rise, rustic breads like sourdough. Lower hydration is for tighter crumb sandwich breads. The more you make bread, the better idea you’ll get of what sort of hydration you like for what. 60% gives me a really easy to handle dough which is great for make-your-own-pizza, especially when folks want to roll (or toss!) their own crust. A bit wetter or drier would also be fine.

1 tsp active dry yeast works well for about a pound of flour, when you want your dough to rise pretty quickly. Less would make for a slower rise. More could be even quicker. Eventually, you’ll taste too much yeast, however, so don’t go overboard unless you really like the taste of yeast. (On the other end of the spectrum, if you have sourdough starter and more time, you can make overnight dough instead.)

The olive oil I use is actually more like a “glug” than an ounce. I weighed my usual glug and it’s about an ounce, but the precision really doesn’t matter. I find a bit of olive oil makes the dough just a bit more pizza-y, while acknowledging that this is nowhere near traditional pizza dough at all.

Always add salt. This one is a rule. Saltless bread (or pizza or flat bread or…) is a sad, sad thing. The 2 tsp bit in my recipe is approximate though. A bit less or more would be fine. Oh, and also don’t add the salt right on top of your yeast. Yeast likes its salt a bit buffered, so add the salt late, or well mixed with the flour.

Rising times are extremely forgiving for a simple, yeasted dough. An hour or two on the counter works. Just throwing it in the fridge (covered) works. Taking it out a hour before baking is a good idea, but you can probably get away with skipping that too.

Baking time and temperature are also pretty flexible. Lower temp? Bake a bit longer. Higher? Shorter. Check it after ~8 minutes and see.

Oh, and lastly? Put whatever you want on top. Tomato sauce and pepperoni is great! So is olive oil, mozzarella cheese, and mushrooms. So is sliced apple, cheddar, and sage. So is…

Experimenting is awesome.


Pizza Fridays (the Dough)

three rounds of pizza dough showing between two silpats

Family meal planning (really any meal planning) is a heck of a lot easier with recurring parameters. We’ve been doing Taco Tuesday almost every Tuesday since we saw the Lego Movie*. We’re trying to do Meatless Mondays more regularly. Friday? Friday is Pizza Night.

I picked up the habit of pizza night from my sister, whose household has a regular pizza and movie night. The beauty of pizza night is it can be as simple as getting delivery pizza and eating it out of the box and it is easily adapted to the “choose your own adventure” model of family dinner.

When I have time, we do make your own pizza on a simple homemade crust. This isn’t three-day, naturally leavened, meant for a wood-burning oven in Rome, crust. It’s more let’s maybe eat some whole grains and mostly everyone likes it just fine crust. And most Friday’s that’s just fine.

Pizza Dough

  • 10 oz white bread flour
  • 10 oz spelt or other whole wheat flour
  • 12 oz water, divided
  • 1 oz olive oil
  • 1 tsp active dry yeast
  • 2 tsp salt

At least 2 and 1/2 hours before dinner – Combine the yeast with 4oz of (body temp or cooler) water. Mix flours, yeast, remaining water, and olive oil until they form a rough dough. Add salt and knead for ~5 minutes. (I use my stand mizer with the dough hook, on low.) Let rise in the bowl for 60-90 minutes.

When the dough has roughly doubled (about an hour), punch it down and divide into six or eight equal(ish) size pieces. Form each piece into a ball. If it’s over an hour until you want to bake, put the dough, loosely covered, in the fridge. (I usually space them out on a half sheet pan, on a silpat, which I cover with another silpat and a towel. Lightly oiled plastic wrap over the top also works well.)

About an hour before baking, have your dough balls on the counter, still loosely covered, so they can rise slightly and come to room temperature. Just before baking, form each into more-or-less a flat circle, about 1/4 in thick. Coat with a bit of olive oil, then add sauce and toppings of your choice.

Bake assembled pizzas at 475ºF for about 12 minutes.


*Taco Tuesday, er, Freedom Friday

Recipes and Noncompliance (Pumpkin Bread)

loaf of pumpkin bread on a wooden cutting board

It often goes something like this:

I have some leftover pumpkin puree in the fridge which I want to use before it goes bad. I’m feeling uninspired by soup. I find, and then lose, an intriguing recipe for pumpkin spice cupcakes. (Younger kid’s reaction was “Can you leave out the spice?” when I was hoping for “Yay! Cupcakes with cream cheese frosting!” So my initial cupcake enthusiasm dimmed.) I decide to make pumpkin bread.

I do a quick search for online pumpkin bread recipes, reject one for having too many things, and choose another. (This one, this time: https://food52.com/recipes/8141-pumpkin-christmas-bread.) I skim it, preheat the oven, and start throwing ingredients together.

I don’t want to use white flour. I start to substitute half oat and then worry that’ll be too dense and stop at one third oat. I use whole spelt flour for the rest.

I think about subbing in coconut sugar for brown sugar, but don’t do it.

I think maybe 1 tsp baking soda is too much, but decide that pumpkin is probably acidic to handle it. (I have no idea if this is actually true.)

1/2 tsp cloves! Really? That’s a lot of cloves. 1/4 tsp.

Hey look ginger! That’s good with pumpkin. Add 1/2 tsp ginger.

Why is there no salt in this recipe? I hate when sweet recipes decide they don’t need salt! 1/2 tsp salt. Nyah. 1 tsp salt.

OK. Time to add the oil and pumpkin. (I’m dumping everything in the same bowl using a scale.) Oil. Check. Oh, oops, I don’t actually *have* 10 ounces of pumpkin. I have 9. It’s all already in the bowl, but I worry it’ll be too dry without that final ounce. I add a grated apple (which was in the other recipe, the one I read and rejected).

Bake. Hope.

Results: Not bad. Good with soft butter. I like the ginger. Could use less baking soda (maybe 3/4t). Also more oven time (was 1hr 20m – still extra moist).

Usually, that’s where it ends. I fail to take notes, forget which recipe I started with, and start all over again next time I have too much pumpkin. This time I actually wrote it down and the kids kept asking for pumpkin bread, so I kept iterating.

2nd version:
all spelt
3/4 tsp baking soda
*scant* 1/4 tsp cloves
1/2 tsp salt
1/2 tsp ginger

Results: good, but crumbly – try eggs?
also maybe reduce sugar

Pumpkin Bread, Current version:

  • 1 2/3 cups spelt flour (or whole wheat or …)
  • 1/3 cup light brown sugar
  • 2/3 cup granulated sugar
  • 3/4 tsp baking soda
  • 1/4 tsp ground cloves
  • 1/2 tsp ground ginger
  • tsp ground cinnamon
  • 1/2 tsp ground nutmeg
  • 1/2 tsp sea salt
  • 1/3 cup vegetable oil
  • 10 oz pumpkin puree (or other squash)
  • 2 eggs

Preheat oven to 325ºF. Oil a large (1.5 lb) loaf pan. Mix dry ingredients. Mix wet ingredients separately. Combine until uniform, but don’t overmix. Pour/spread in loaf pan. (It’ll be thick!) Bake ~65 minutes.

Results: Pretty good. Slices without crumbling. Still noticeably sweet, but a little less so. I may even leave it this way next time.